Customize Consent Preferences

We use cookies to help you navigate efficiently and perform certain functions. You will find detailed information about all cookies under each consent category below.

The cookies that are categorized as "Necessary" are stored on your browser as they are essential for enabling the basic functionalities of the site. ... 

Always Active

Necessary cookies are required to enable the basic features of this site, such as providing secure log-in or adjusting your consent preferences. These cookies do not store any personally identifiable data.

No cookies to display.

Functional cookies help perform certain functionalities like sharing the content of the website on social media platforms, collecting feedback, and other third-party features.

No cookies to display.

Analytical cookies are used to understand how visitors interact with the website. These cookies help provide information on metrics such as the number of visitors, bounce rate, traffic source, etc.

No cookies to display.

Performance cookies are used to understand and analyze the key performance indexes of the website which helps in delivering a better user experience for the visitors.

No cookies to display.

Advertisement cookies are used to provide visitors with customized advertisements based on the pages you visited previously and to analyze the effectiveness of the ad campaigns.

No cookies to display.

Water dripping from your independent rinse?

Sep 5, 2024How To

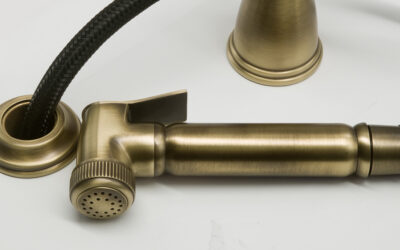
Following the installation of your independent rinse, you may experience a small amount of water leaking from the end. In most cases this is not a product fault.

It is common in new installations for debris to become lodged inside the spray, causing the sliding valve mechanism to not return fully to its off position. This can literally be a fraction of a millimetre, which causes the water to bypass the seal.

The following instructions detail the process to follow, but please also refer to the video below which shows a member of the Bidbury & Co production team demonstrating the process.

Turn off water

Unscrew aerator

Remove aerator ring (brass part)

Clean sealing surface of ring (inside and outside surfaces)

Turn on water

Let water run until debris is cleared

Turn off water

Insert aerator ring (ensure it is fully seated)

Screw aerator back on

It is also important to ensure the pressure being supplied to the rinse is not too high. Excessive pressure can cause water to be forced past the shut-off valve/seal. In most cases, we recommend a maximum water pressure of 3.0bar. If your supply is in excess of this (most UK households will be between 3-5bar), you will need to fit a pressure reducing valve.

Please Note: Damage caused by excessive water pressure is not covered under the manufacturer’s warranty.

Share story

Related Posts

Bidbury & Co unlacquered finishes

Bidbury & Co unlacquered finishes

Embrace Nature! Bidbury & Co Unlacquered Brass Kitchen Brassware & Accessories Your Bidbury & Co kitchen brassware and accessories in Old English Brass and Polished Brass are designed with an unlacquered finish, allowing them to age gracefully over time....

Water leaking from the spout and the rinse at the same time?

Water leaking from the spout and the rinse at the same time?

Following the installation of your four hole kitchen tap, you may experience a small amount of water leaking from the spout and the rinse at the same time. In most cases this is not a product fault. It is common in new installations for debris to become lodged inside...