Aldsworth Installation Instructions
PLEASE READ THESE INSTRUCTIONS CAREFULLY AND KEEP IN A SAFE PLACE FOR FUTURE REFERENCE.
This guide contains general installation instructions on how to install your product. However, it is important that the item is installed by a qualified and experienced professional. Therefore reliance on these instructions will be minimal.
Care taken during the installation will ensure long life and trouble free operations from the Aldsworth wall mounted pot filler.
It is extremely important that all pipe work is flushed thoroughly after installation to avoid damaging the ceramic discs. It is recommended that the both hot and cold valves/handles on the tap are opened fully before you turn the water supply back on. This will ensure no debris will get lodged in the disc, causing possible damage.
SPARE PARTS LIST
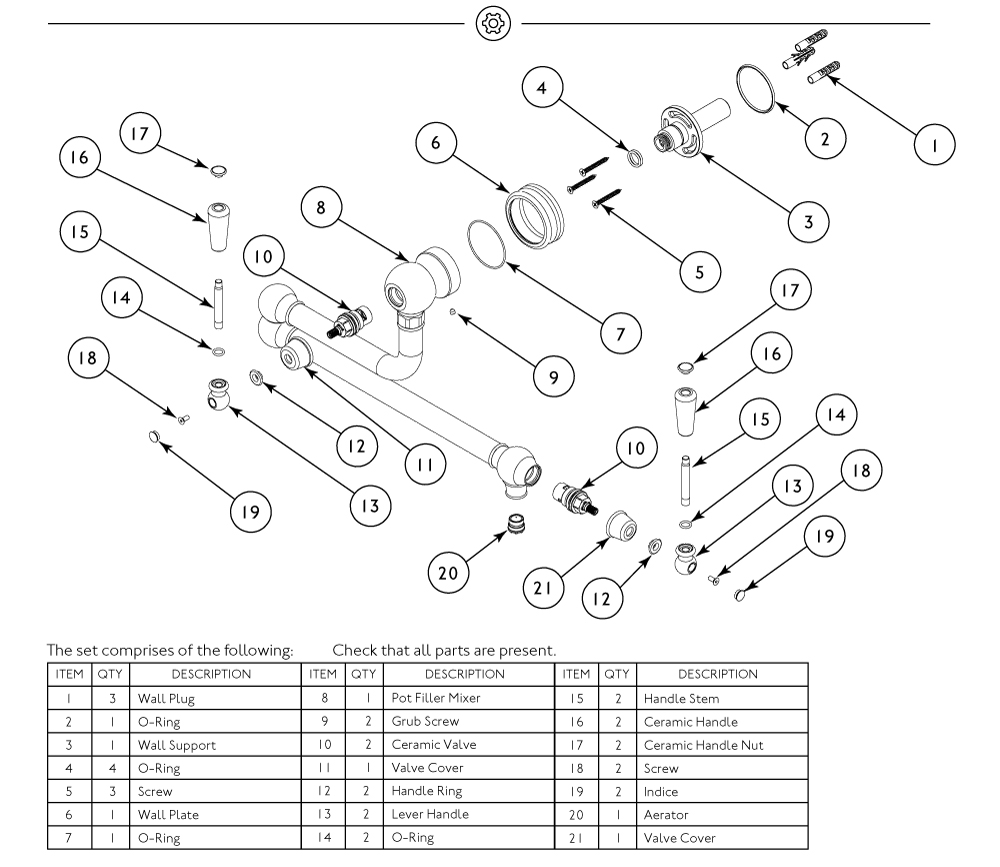
Fitting an easily accessible isolating valve to the cold feed is recommended for ease of maintenance at a later date. We recommend using a high quality, push fit, flexible connection to attach your water supply to the wall support (Item 3). A pressure reducing valve should be used and positioned in an accessible location for adjustment once the installation of the pot filler is complete.
Connect mains water supply pipe, ensuring the pressure has been reduced as required, using a pressure reducing valve (not supplied)
REMEMBER TO TURN OFF THE MAINS WATER SUPPLY BEFORE CONNECTING TO ANY EXISTING PIPE WORK.
- Uninstall wall support (item No: 3) using screws and wall plugs (if suitable)
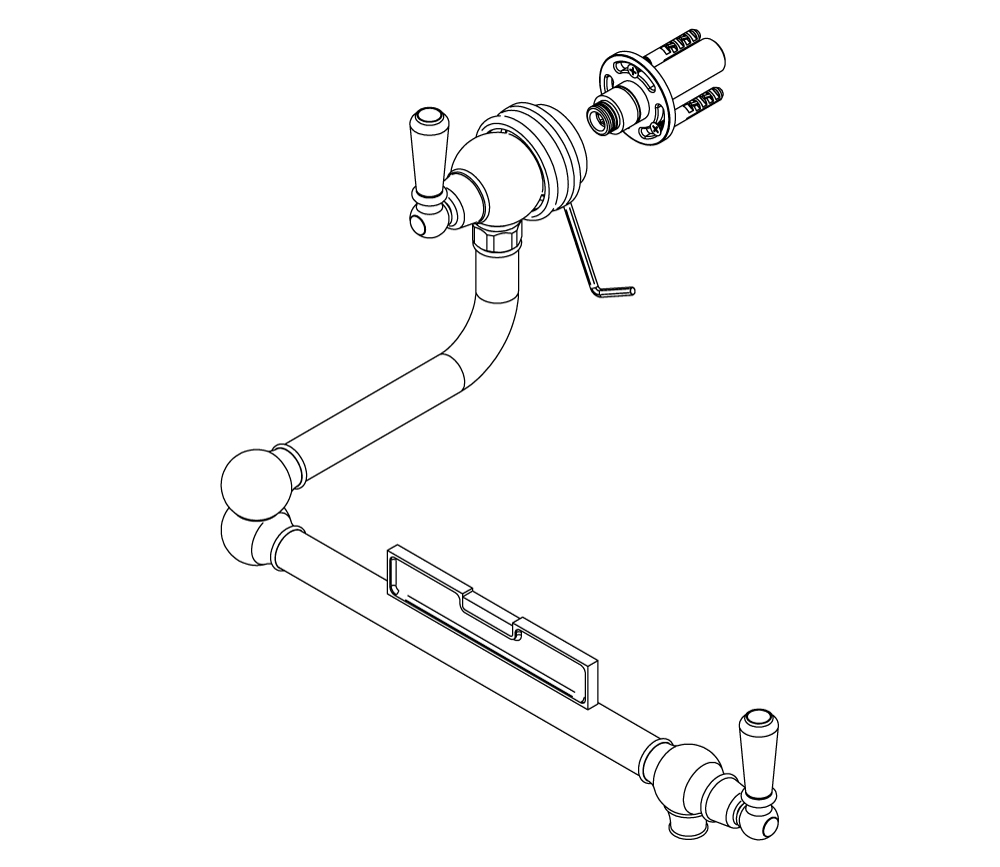
- Install pot filler main body on wall support (item No:3)
- Use a spirit level to adjust position of pot filler on the support; (see image on right)
- Tighten both grubscrews (see image on right) and tighten wall plate (item No:6) to the wall support
- Turn on water supply
- Check for joint and connection leaks and open both taps letting the water flow for a few minutes
- If required, adjust the pressure reducing valve to provide the ideal flow.
- ENSURE YOU HAVE THE CORRECT PRESSURE BEFORE FITTING:
- Recommended operating pressure 2.0 Bar
- Maximum operating pressure 3.0 Bar
REGULAR DAILY CLEANING
The surface finish we use on our taps is very durable and hardwearing. However, care should still be taken when cleaning them. They should be cleaned only with warm soapy water followed by rinsing with clean water and drying with a soft cloth. All finishes are vulnerable to astrong cleaning agents and therefore substances such as household cleaners, disinfectants, denture cleaners, hair dyes can cause damage to the surface and should be avoided.
For more detailed information on taking care of your Bidbury tap, click here